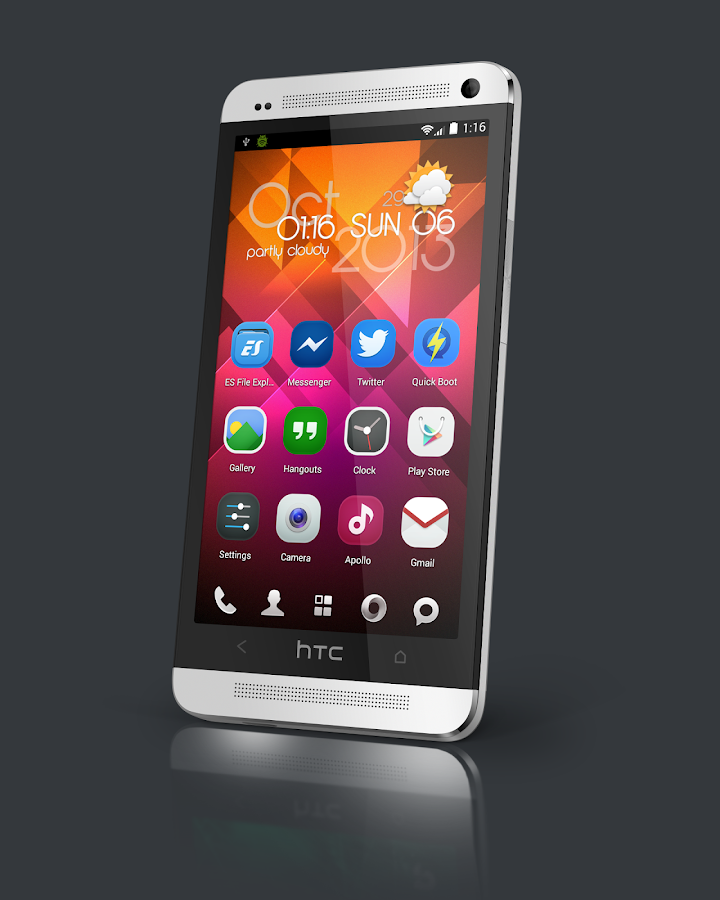
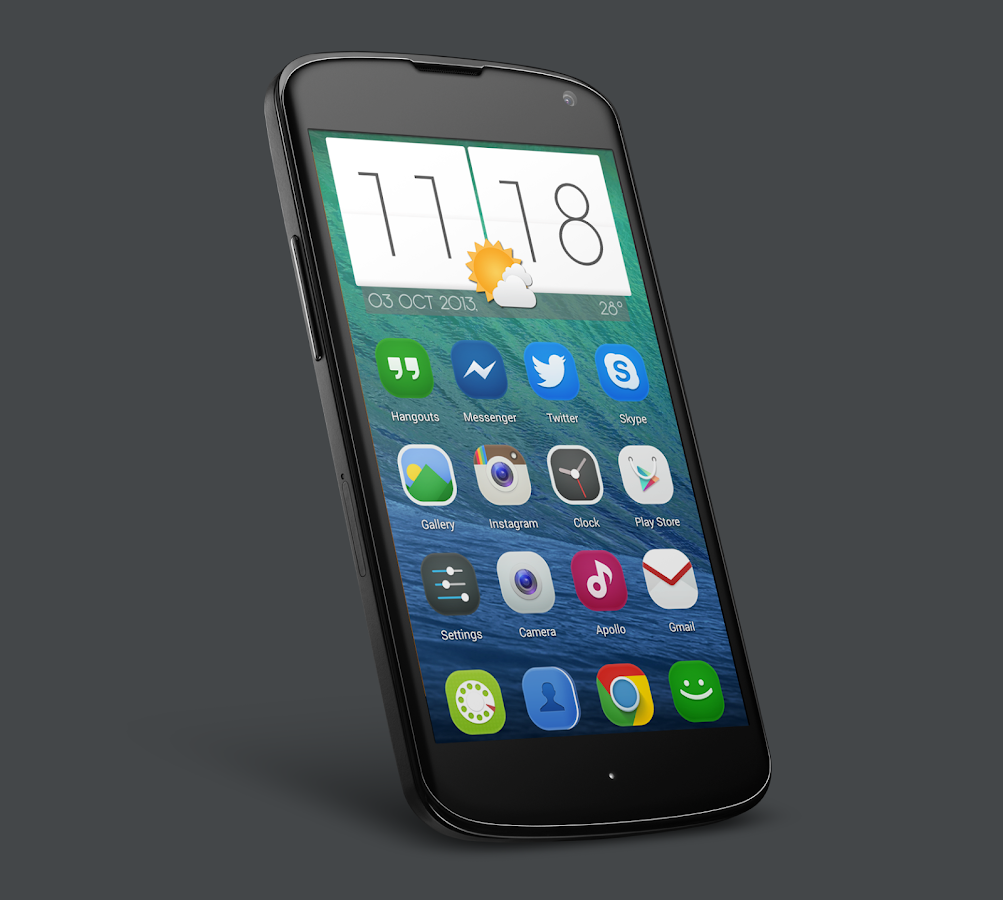
Download Here
This is default featured slide 1 title
Go to Blogger edit html and find these sentences.Now replace these sentences with your own descriptions.This theme is Bloggerized by Lasantha Bandara - Premiumbloggertemplates.com.
This is default featured slide 2 title
Go to Blogger edit html and find these sentences.Now replace these sentences with your own descriptions.This theme is Bloggerized by Lasantha Bandara - Premiumbloggertemplates.com.
This is default featured slide 3 title
Go to Blogger edit html and find these sentences.Now replace these sentences with your own descriptions.This theme is Bloggerized by Lasantha Bandara - Premiumbloggertemplates.com.
This is default featured slide 4 title
Go to Blogger edit html and find these sentences.Now replace these sentences with your own descriptions.This theme is Bloggerized by Lasantha Bandara - Premiumbloggertemplates.com.
This is default featured slide 5 title
Go to Blogger edit html and find these sentences.Now replace these sentences with your own descriptions.This theme is Bloggerized by Lasantha Bandara - Premiumbloggertemplates.com.
မိမိဖုန္းကိုသြက္လက္ျမန္ဆန္မႈကုိေပးမယ္-Smart RAM Booster Pro v4.8 build 765 apk
Download Here
ဖုန္းေလးေနတဲ့ေဘာ္ဒါေတြအတြက္ - RAM Manager Pro v7.1.8 Apk

ဖုန္းေလးေနတဲ့ေဘာ္ဒါေတြအတြက္ - RAM Manager Pro v7.1.8 Apk ေလးကေတာ့ ေဆာင္ထားသင့္တဲ့
ေဆာ့၀ဲေကာင္းေလးပါ ဖုန္းေလးေနတာ ကို memory Clean ျခင္းစတာေတြ
ကိုလုပ္ေဆာင္ေပးႏိုင္တဲ့ေဆာ့၀ဲေကာင္းေလးပါ ေအာက္မွာေဒါင္းၿပီးသံုးႏိုင္ပါတယ္
RAM Manager Pro v7.1.8 Apk | 136 KB | Resumable Links | Requires Android:2.1 and up |
RAM Manager Pro
What’s in this version :- Minor changes
App Review:
★Balance – Option which makes your RAM to the best optimization, this option is for everyday using. Use this option when you want to have fast phone without lags.
★Balance (More free memory) – This option is nearly the same as Balance, but this option should be advantageous for users who have more RAM than 512 MB. This option gives you more free memory but a bit reduces multitasking.
★Balance (More multitasking) – This option is nearly the same as Balance, but this option should be advantageous for users who have less RAM than 512 MB. This option gives you more multitasking, but a bit reduces free memory.
★Hard Gaming – Option which stabilizes your RAM for playing hardest games. Use this option for games which lag on your phone. Your games will run smooth without lags.
★Hard Gaming (Less aggressive) – This option is similar to Hard Gaming but should be better for devices with RAM lesser than 512MB.
★Hard Multitasking – Option for users which are really hard working on their phones. You can have a lot of running apps and quickly switch between them without lags.
★Default (Samsung) – Default settings by Samsung, these settings are also used by LG, HTC, etc.
★Default (Nexus S) – Default settings which are used by all Google devices.
★Default – This option reverts your RAM to your default settings, which you had before you installed this app.
★Lock launcher in memory
★VM Heap size
★Swap file – Improves a performance but it may degrade your SD card life
★Memory info
★Free memory meter
★Widget
★Chosen option is automatically set on each reboot
★You can easily switch between all options without rebooting
If you want be really sure that my application works, I recommend to not use any RAM scripts and tweaks.
စိတ္ကူးထဲက ပံုကို အပီေရးဆြဲ ႏိုင္တဲ့ - BeFunky Photo Editor Pro v5.0.1 Apk

ဒီတစ္ခါ ဓာတ္ပံုျပင္တာ အထူး၀ါသနာပါတဲ့ ေဘာ္ဒါေတြအတြက္ BeFunky Photo Editor Pro v5.0.1 ေလးကို ေဆာင္ထားေစခ်င္ပါတယ္။ ဒီတစ္ခါ သူ႔မွာပါ၀င္လာတဲ့ photo effects ေလးေတြကေတာ့ တကယ့္အံ့မခန္းပါပဲဗ်ာ။ စိတ္ကူးစိတ္သန္း ဆန္းတဲ့ ေဘာ္ဒါေတြအတြက္အတြက္ေတာ့ Anything you want to do to your photo, you can do with BeFunky Pro ေပါ့ေလ။ P: ျပဳျပင္ၿပီးတဲ့ မိမိစိတ္ႀကိဳက္ပံုေတြကိုလည္း နာမည္ႀကီး Facebook, Instagram, Twitter ေတြကိုလည္း တိုက္ရိုက္ Share လုပ္ႏိုင္ပါေသးတယ္။ ကဲခ်စ္သူဆီက အာဘြားေကာင္းေကာင္းေလး လိုခ်င္ရင္ေတာ့ ေအာက္မွာ ေဒါင္းႏိုင္ပါၿပီ။ ဒီေကာင္ေလးကေတာ့ 18.6 MB ျဖစ္ၿပီး။ Android Version 2.3 နဲ႔ အထက္ ဖုန္းအားလံုးမွာ အသံုးျပဳႏိုင္ပါတယ္။
အဆင့္ ၁ ေအာက္မွာ Download Here ဆိုတာကိုႏွိပ္ကိုက္ပါ။
အဆင့္ ၂ Adfly မွာ 5 seconds ေလာက္ေစာင့္ ေပးပါ။
အဆင့္ ၃ << SKIP AD>> ကို ႏွိပ္ေပးပါ။
အဆင့္ ၄ Download link က်လာပါလိမ့္မယ္။
အဆင့္ ၅ ဖိုင့္ေလးကိုေဒါင္းေပးလိုက္ပါ။
အဆင့္ ၆ အဆင္ေျပပါသြားျပီး ခိခိ
♪ Huawei ဖုန္းမ်ိဳးစံု Root ေဖာက္နည္း ၊ Firmware တင္နည္း ႏွင့္ အျခား ဗဟုသုတမ်ားစြာ (ျမန္မာလို Ebook) ♫

Today's Technology မိုဘိုင္းဖုန္းၿပဳၿပင္နည္းသင္တန္း
** Step-1.ေအာက္က Download Button ကိုႏွိပ္လိုက္ပါ
** Step-3. " << SKIP AD >> ".ကိုႏွိပ္ေပးပါ။
Android ဖုန္း version 4.0 ေတြ အထက္မွာ usb debugging လုပ္နည္း

မဂၤလာပါ ကၽြန္ေတာ့္ ညီေလး တစ္ေယာက္ ေမးထဲ ကေန Android ဖုန္း version 4.0 ေတြ အထက္မွာ usb
debugging ဘယ္လို လုပ္ရ သလဲလို႔ ေမးလာလို႔ ဒီပိုစ္ကို အျမန္ေရး လိုက္တာပါ။ တကယ္ေတာ့ တတ္သိ
နားလည္ ေနသူေတြ အတြက္ေတာ့ လြယ္လြယ္ေလး ေပါ့ဗ်ာ။ ဖုန္းတစ္လံုးကို ဝယ္ထားၿပီးမွေတာ့ root မယ္
ျမန္ မာေဖာင့္ေလး ထည့္မယ္ စသည္ျဖင့္ စမ္းသပ္ခ်င္ ၾကတာကေတာ့ ထံုးစံျဖစ္ေနပါၿပီ။
ဖုန္းကို root ပံု နည္းလမ္းေတြ ကလည္း အင္တာနက္ စာမ်က္နွာမွာ ျပည့္ေနပါၿပီ။ root လုပ္တဲ့ ေနရာမွာလဲ
လက္စြမ္းထက္တဲ့ one click tool ေတြလည္း ေပၚေပါက္ေနေတာ့ root တာေတာ့ သိပ္အပန္း မႀကီးေတာ့
ပါဘူး။
အင္း ဒီေနရာမွာ လူသစ္ေတြ အေနနဲ႔ usb debugging လုပ္တာေလး ကိုမွ မသိရင္ေတာ့ ဘာကိုမွ ဆက္ မ
လုပ္နိုင္ေတာ့ ဘူးေပါ့ဗ်ာ။
ကၽြန္ေတာ့္ အေနနဲ႔ ဒီေနရာမွာ Android version 4.0 up ေတြမွာ usb debugging လုပ္တာေလးကို ေျပာ
ျပေပးသြားမွာပါ။ သိျပီးသား မိတ္ေဆြတိို႔ ကေတာ့ ေက်ာ္သြားလိုက္ပါ။
ပထမ မိမိတို႔ ဖုန္းရဲ့ Setting > application > ကိုသြားပါ development > usb debugging ကို ႏွိပ္ပါ။

အိုေက ဒီေနရာ မွာ သာမန္ android version ၄.၀ ေအာက္က ဖုန္းေတြ ေတာ့ အိုေက သြားပါၿပီ။ Android
version 4.0 up နွင့္ အထက္ က် ေတာ့ usb debugging အမွန္ျခစ္ေလး ေနရာမွာ ႏွိပ္ မရဘဲ ျဖစ္ေန ပါ
တယ္။ ဒါကို မိမိတို႔ ဖုန္းရဲ့ setting > developer options > build number ကို (၇) ခ်က္ထိ ႏွိပ္ေပးလိုက္
ရင္ ေတာ့ usb debugging လုပ္လို႔ ရပါၿပီ ခင္ဗ်ာ။

ဒါကေတာ့ build number ကုိ ျပထားတဲ့ ပံုပါ။

တစ္ဆက္တည္း မိမိတို႔ ဖုန္းေတြနွင့္ ကိုက္ညီမယ့္ usb driver မ်ားကို လိုခ်င္တယ္ ဆိုရင္ေတာ့ ဒီမွာ ဝင္ယူ
လိုက္ပါ ခင္ဗ်ာ။
ကၽြန္ေတာ့္ ဘေလာ့ေလးကို လာလည္ၾကတဲ့ သူငယ္ခ်င္းမ်ားကို ေက်းဇူး တင္ပါတယ္။ မိတ္ေဆြတိို႔ root လုပ္
ခ်င္တဲ့ ဖုန္းအတြက္ saithu102@gmail.com သို႔ ဆက္သြယ္ အကူအညီ ရယူ ႏိုင္ပါၿပီ။

Huawei G730-U00 ကို root လုပ္နည္း
Build Number 135 မွာ Root ေဖာက္မရတာေတြရွိေနတာကုိ ကိုညီပိုင္ ရွာေဖြထားတဲ့ နည္းလမ္းေလးတင္ေပးခ်င္ပါတယ္. ဒီနည္းလမ္းေလးကေတာ့ CWM တင္ျပီး အျမစ္တူးတာပါ
CWM တင္ျပီးျပီဆိုရင္ မိမိတုိ ့ဖုန္းကုိ လုပ္ခ်င္တုိင္းလုပ္လုိ ့ရပီေနာ္.... :D
ကဲ...ေျပာတာၾကာတယ္ လုိအပ္တာေတြေဒါင္းေပးပါဗ်ာ......
Download G730-U00 CWM En Version
Download Sp FlashTool 5.1343.01
Download UpdateSupersu1.94.zip
ေဒါင္းလို ့ျပီးျပီဆိုရင္ Sp FlashTool ကုိဖြင့္လိုက္ပါ ဒီလိုေလးေပါ့ဗ်ာ...

Scattor Loading ဆိုတဲ့ အကြက္ေလးမွာ ခုနက G730 CWM ထဲက
MT6582_Android_scatter_emmc.txt ဆိုတာေလး
ေရြးေပးလိုက္ပါ ..ျပီးရင္ Recovery ဆိုတာေလးကုိအမွန္ျခစ္ျပီး ေဘးမွာ G730 CWM Folder ထဲက
image ကိုေရြးေပးလိုက္ပါ
ျပီးရင္ Download ဆိုတဲ့ခလုတ္ေလးႏွိပ္လိုက္ပါ ျပီးျပီဆိုရင္ မိမိတို ့ဖုန္းကုိ Battery ျဖဳတ္ျပီး
ကြန္ျပဳတာမွာထုိးလုိက္ပါ ..ျပီးရင္ Battery ျပန္တပ္လိုက္ပါ သူ ့ဟာသူေရးေပးသြားလိမ့္ပါမယ္...ျပီးရင္ေတာ့ CWM ေခၚျပီး SuperSu ေလးသြင္းလိုက္ရင္
အဆင္ေျပပါျပီဗ်ာ.........


ဗား႐ွင္းနိမ့္ ဖုန္းမ်ားတြင္ Application မ်ားမ်ားရေအာင္ ထည့္သြင္းနည္း
ဗား႐ွင္းနိမ့္တ့ဲ Android ဖုန္း အခ်ိဳ႕ဟာ Memory ပမာဏ နည္းတတ္ၾကပါတယ္။
ဒါေၾကာင့္ Apps ေတြ အမ်ားအျပား Install လုပ္ခြင့္မရႏိုင္ပါဘူး။ဒါဆို Apps ေတြ အမ်ားႀကီး ဘယ္လို ထည့္သြင္းၾကမလဲ?
ကြန္ေတာ္ စမ္းသပ္ထားတ့ဲ နည္းေလးကို ေျပာျပပါ့မယ္။
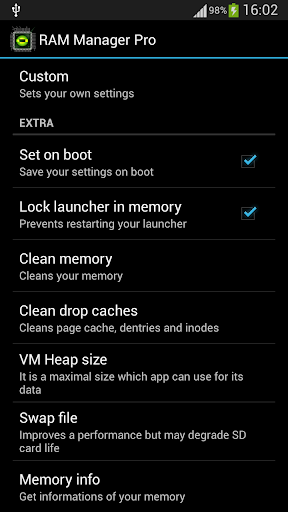
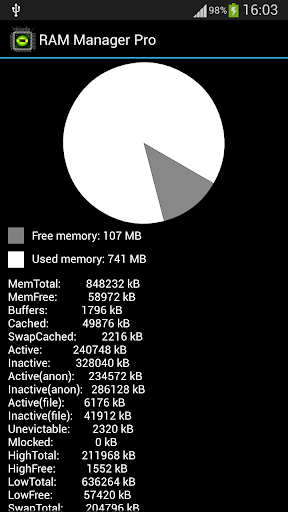
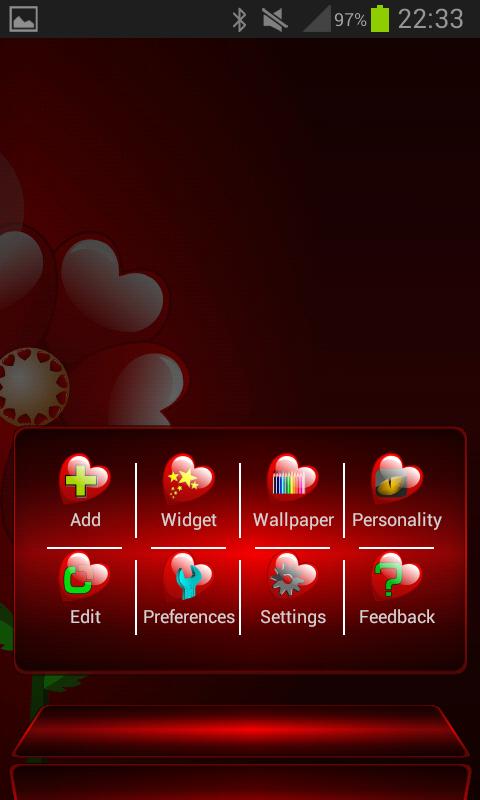
၁။ မိမိ ဖုန္းဟာ Root နဲ႕ CWM Recovery ( Clock Work Mod Recovery ) ရွိၿပီးသား ျဖစ္ေနရပါမယ္။အဆင့္ ၁။
၂။ SD Card 4GB / သို႔မဟုတ္ 4GB အထက္ ကဒ္ အသစ္ တစ္ခုရွိရပါမယ္။
ဒါဆို ရပါၿပီ။
ေ႐ွးဦးစြာ မိမိ ထည့္သြင္းထားေသာ
Apk မ်ားႏွင့္ ၎တို႕၏ data မ်ားကို Backup လုပ္ထားလိုက္ပါ။ ဒီေနရာမွာ System app & User app ေတြကို data ႏွင့္တကြ Backup လုပ္ထားလို႔ရတ့ဲ Titanium Backup apk ကို သုံးဖို႕ အၾကံေပးလိုပါတယ္။
မ႐ွိရင္ေအာက္ကလင့္မွာေဒါင္းပါ။
Titanium Backup Pro V4.0.0.apk အား Box Link မွ ေဒါင္းရန္ 1.3MBPro ဗား႐ွင္း ဆိုိလို႔ ဝယ္ထားတယ္ မထင္လိုက္ပါနဲ႕ဦး။ Custom Rom တစ္ခုထဲမွာ ေတြ႕လို႔ ဆြဲထုတ္ ထားလိုက္တာပါ။
အဆင့္ ၂
SD Card အသစ္ကို စသုံးပါမယ္။
SD Card အသစ္ထည့္ပီး CWM Recovery ဝင္လိုက္ပါ။
Advanced / Partition sd card / ကေန 1GB ေလာက္ ပိုင္းလိုက္ပါ။ ROM တစ္ခုလုံးကို Format ခ်ပီး Partition ပိုင္းသြားပါလိမ့္မယ္။
ကဲ စိတ္ႀကိဳက္ app ေတြထည့္ေပေရာ့။ Your Phone Storage is Low ျပတ့ဲအထိ ထည့္ပစ္လိုက္ပါ။
အဆင့္ ၃
Link2SD.apk ေလးကို ေအာက္ကလင့္ ကေန ထပ္ေဒါင္းလိုက္ပါဦး။
Link2SD V3.1.5.apk အား Box Link မွေဒါင္းရန္ 1.1MBLink2SD ကို Install လုပ္ပီး ဖြင့္လိုက္ပါ။ Partition ကိုေ႐ြးခိုင္းပါလိမ့္မယ္။ sdext2 လို႕ေ႐ြးေပးလိုက္ပါ။ Reboot ခ်ခိုင္းပါလိမ့္မယ္။ Reboot လုပ္ေပးလိုက္ပါ။


အဆင့္ ၄
Power ျပန္တက္လာရင္ Link2SD ကိုဖြင့္ပါ။ ဘယ္ဘက္ေဘးနားကို လက္နဲ႕ပြတ္ဆြဲပီး Link Dalvik-Cache File လုပ္ပါ။ Menu ကိုႏွိပ္ပီး Multi-Select ကေန apk ေတြအားလုံးကို Select ေပးလိုက္ပါ။ Select ေပးပီးရင္ Menu ကေန Creat Link / OK လုပ္ပါ။
မိမိ ဖုန္းရဲ႕ Storage Memory ကို ၾကည့္လိုက္ပါဦး။ Free Memory ဟာ အမ်ားႀကီး က်န္ေနေသးတာကို ေတြ႕ရပါလိမ့္မယ္။
အဆင္ေျပၾကပါေစ။
မွတ္ခ်က္။ ။ SD Card ဟာ Partition မျဖစ္ရင္ အလုပ္မလုပ္ပါ။
မသိေသးသူမ်ားအတြက္ ရည္႐ြယ္ပါသည္။
Android app ေရးသားနည္းစာအုပ္ေကာင္း ၂ အုပ္

ဖတ္ရႈသူေတြအေနနဲ႕ ေသခ်ာေလ့လာမယ္ဆိုရင္ Android App ေတြဖန္တီးဖုိ႕အေျခခံေကာင္းေတြရရွိသြားပါလိမ့္မယ္။ ေအာက္က link မွာစာအုပ္ ၂ အုပ္ကုိရယူနိင္ပါတယ္။
Android app development for Dummies စာအုပ္မ်ားအားရယူရန္
အားလုံးပဲအဆင္ေျပၾကမယ္လုိ႕ေမွ်ာ္လင့္ပါတယ္။
သက္နိင္စုိး (Myanmar Mobile App Store)
ခ်စ္သူမ်ားေန႕အတြက္ အလန္းဇယားလက္ေဆာင္ေလး - Valentine Next Launcher Theme v1.0 Apk
ခ်စ္သူမ်ားေန႕အတြက္ Launcher အလန္းေလးတစ္ခုထပ္ျပီးတင္ေပးလိုက္ပါတယ္ဗ်ာ။ Next Launcher ကေန ထုတ္လုိက္တဲ့ Valentine Next Launcher Theme v1.0 ျဖစ္ပါတယ္။ ကၽြန္ေတာ္စမ္းသံုးၾကည့္ျပီး သေဘာက်လို႕ လက္ေဆာင္အျဖစ္တင္ေပးလိုက္တာပါ။ ခ်စ္သူမ်ားေန႕ အတြက္ မိမိရဲ႕ ခ်စ္သူကိုအမွတ္တရလက္ေဆာင္ ထည့္ေပးလို႕ရတာေပါ့ဗ်ာ။ ပထမဆံုး Next Launcher ကို Install လုပ္ပါ။ ျပီးသြားမွ Valentine Next Launcher Theme v1.0 ကို Install လုပ္ျပီး Theme ေရြးျပီးသံုးလို႕ရပါျပီဗ်ာ။ နမူနာအေနနဲ႕ ေအာက္မွာ Screen Shot ေတြ ရိုက္ျပထားပါတယ္ဗ်ာ။ Android OS 2.2 ႏွင့္အထက္ဖုန္းမ်ားမွာအသံုးျပဳႏိုင္မွာျဖစ္ပါတယ္ဗ်ာ။
ေက်းဇူးအထူးတင္ရွိပါတယ္ဗ်ာ။
ရိုးရိုးရွင္းရွင္းေလးနဲ႕ လွတဲ့ - MOND - Launcher Theme v1.3.3 APK
** Step-3. " << SKIP AD >> ".ကိုႏွိပ္ေပးပါ။
Download